Building a Simple Rest API with Go
— backend, go, tutorial, webdev — 3 min read
After recently joining Central Tech, I was given my first project: implement a new product creation and querying API in Go. I took this as a chance for me to finally dive deep into Go, something I've been wanted to do after having heard praises about it from many others. I also decided to start detailing the things I learned along the way, both for personal reference and to ensure that I understand concepts enough to explain it in writing.
As such, this article and my site will hopefully come to act as a resource that I can refer back to, and hopefully be helpful to someone else as well.
Basics
This piece assumes that you have go installed and working on your computer. If not, please see the Go language's official getting started guide.
Before writing the actual functions to execute, we first need to define our program and import the necessary packages. Create a new file called main.go and add the following lines.
Let's go over each of the components of the code above.
Packages
Packages are Go's source code, organized into system directories. They allow for code reusability across different applications. In order to differentiate an executable program from a library to be used by other programs, Go dictates that we includes package main in the header of the main file of any executables. When compiling, that package main tells the Go compiler that the package should compile as an executable program rather than being built as a library.
Imports
The keyword 'import' is used for importing packages into our program or another package. When importing packages, the Go compiler will look in the locations specified by the two environment variables:
$GOROOTwhere packages from the standard library shipped with Go are stored and$GOPATHfor fetched third-party or self-made packages.
Note: Go by design does not allow declaration of unused import and will adamantly complain about it during compile time if any is found
In our case, both packages comes from the standard library:
logallows us to log errors and other issues.net/httpgives us HTTP client and server implementation for building the actual API
After declaring the packages, we can begin defining and serving our API. Without using third party libraries and routers, there are two main 'approaches' to this.
If we implement our handler as a function, we'd use http.HandleFunc. Otherwise, if we'd implemented our handler as a type with a ServeHTTP method, we'd use http.Handle.
For simple implementations, the first option is much easier and clearer to read and understand. But using a struct type allows storing of useful information in it, an example of which is the file server from the standard library. The struct contains the root directory for file service. See this Stack Overflow post for a more detailed explanation.
As our program is rather simple and straightforward, we'll stick to the first approach.
Note: HTTP handlers are processes that runs in response to a request made to a web application. For more information, see its Wikipedia page
Building a Web Server
Now we get to defining how our API server will actually behave, and the content we're going to send as our response. Add the following lines below our imports and package declarations:
Again, let's run through each function.
apiResponse
The function apiResponse is responsible for writing the response code and JSON. The function itself takes two arguments: w of type http.ResponseWriter assembles our HTTP server's responses, while r reads and parse the requests. Now to go through each line of the function:
w.WriteHeader(http.StatusOK)writes the HTTP response code 200, indicating that the requested resource (the JSON response in our case) has been successfully fetched and is transmitted in the message body.w.Header().Set("Content-Type", "application/json")indicates the return type of the requested resource.w.Write([]byte('{"message":"hello world!"}'))finally writes our response in the message body.
main
The main() function serves a special purpose in Go: it acts as the entry point of the executable programs. It does not take any argument nor return anything. And unlike some other languages, we do not need to explicitly call main, as Go automatically calls the function when run.
In our main function, the HandleFunc call tells the HTTP package to handle all requests to the web root ("/") with our apiResponse function. It then calls http.ListenAndServe, specifying that it should listen on port 8080 on any interface.
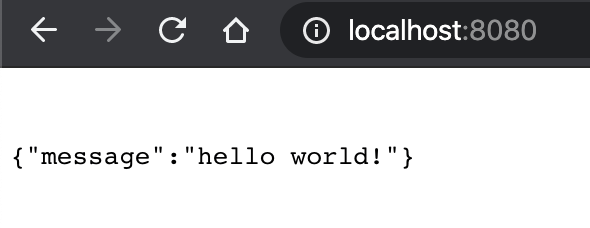
If we now run the command go run . and navigate to localhost:8080 on our web browser, we should see something like this.
We can also enter the same URL into our REST Client (i.e. Postman, Insomnia, Paw) using the "GET" method to get the same result.

Making it RESTful
Now that our server can return a response, we can configure it to do different things depending on the method being requested.
To do so, we can modify our apiResponse function as such:
Now if we close the previous version of our server with ctrl-c and start it once again, we should get different responses depending on the method we requested from our REST Client.
Our final main.go should look something like:
Closing
This covers the basic of building a REST API server. In later posts I plan on going over the net/http library in more detail, as well as using third-party router libraries such as 'gorillia/mux' and 'go-chi/chi' for more complex routings.
If you have any questions, feel free to reach out to me on Twitter or via email.